The Right Stuff: Wallpapering Tools

Wallpaper by Roger Turner, Poet, May 2012

The room was dank and dreary
The past hung in the air
There was a scent of mildew
A smell of history was there
The paint was old and faded
With stains all dark and brown
The wallpaper too was dated
And it needed to come down

Have you hung wallpaper, yourself?

A wall? An entire room? Several rooms? Does even talking about wallpapering make you anxious?

I’ve yet to meet a homeowner who admits to taking on a wallpapering ‘honey-do’ job and enjoying it. It’s a challenge. If you’re not careful the seams show, or overlap. The pattern doesn’t line up. The strips appear to be different shades (did you forget to reverse each strip). It’s a slow process for the inexperienced and can rattle your nerves

Call me crazy, but I enjoyed it!

In our previous house, I wallpapered every room except a bedroom and baths, some more than a couple of times. Sounds crazy, but once the job got started, I found it therapeutic and I’m generally not a patient person. Wallpapering requires concentration and patience.

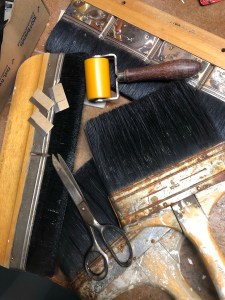
Like any job, if you don’t have the right tools, the work becomes more difficult. My father was a painter/paper hanger so I inherited enough of the proper tools and his instructions to help me succeed to a certain degree: a legitimate table, brushes, scissors, straight edge, roller, sponges and some razor blades. Razor blades are quickly consumed, one might do a sheet, maybe two sheets, so don’t be stingy on blades, they dull quickly.

Here’s a tip to help speed along the process. Paste several strips at a time, fold them, pasted side together, and put them aside in a plastic bag. No need to paste and hang one at a time. Those strips in the bag will stay moist for a long time, until you’re ready to use one.

Interestingly, the different layers of wallpaper can tell a story about a family’s growth and changing tastes. In a child’s room, the paper might go from whimsical to serious in a span of a few years as the youngster matures. While an adult might leave wallpaper behind completely as painted walls become the new norm.

One more suggestion, learn to ‘double cut’. Sometimes, you might want to use an extra piece of paper (scrap piece) to fit in a spot. Lay that piece over one that’s already in place, lining up the pattern as you do it. Then cut through both pieces, peel off the trimmed section of the top piece and, Eureka, the new seam will be perfect and you’ve economized a piece that was going to be scrapped.

Some frustration is bound to set in, so do remember to be patient. Sure, I made mistakes, but was always able to correct them. No one else would find them. Unless the ‘honey’ in ‘honey-do’ does a final inspection. In that case, remember this for the next redecorating chore.,.

…painting is more forgiving!

Steve (04/25/23)

To DIYers everywhere..,

The Shovel (and me)

Credit: Wonkee Donkee Tools

I grew up in New England, in a working class neighborhood of 3-decker houses, large multi layered structures with a family occupying each floor. My family had the first floor, and why not, it was ours. Renters took floors two and three. From my earliest recollections, the house was heated with coal. A coal shovel, or two, was always laying on the dirt floor of our cellar, between the furnace and the coal bin

The ‘coal man’ would drive his delivery truck along side a ground level window above the coal bin, and deliver the coal via a long chute from the truck, through the open window and into the bin.

It was my dad’s job to shovel the lumps of coal into the furnace, regularly, to keep a steady flow of heat into the house. The heavy steel shovel with upturned sides was the tool he used for the job. It was laborious.

I was still a youngster when dad converted our furnace from coal to oil, but the shovel still had a purpose. It became my tool of choice, my only choice actually, for shoveling snow. Never mind the weight of a big snow, the shovel, itself, was a man’s size tool, heavy, and using it to move snow was laborious.

Along came the light weight aluminum snow shovel, specifically designed for that job. What a blessing. Of course, aluminum isn’t as strong as steel and it strained under the weight of a blade full of snow, rivets loosened, the cutting edges bent* and the shovel became less stable. Snow removal, became frustrating, as well as laborious.

Ahhh, plastic. So many products once made of steel are now made with plastic because today’s resins used in plastic are super strong, resilient. The plastic shovel has proven to be very light weight and durable. I have two that I’ve used for years. They moved with me from house to house and do quite well at removing snow. Nevertheless, the very task of removing snow, itself, is still ever laborious.

As time passed and I could afford something more elaborate, my choice of snow removal tools and methods changed. I bought a snow blower, or thrower. It’s big, powerful and noisy. However, while it shortens the labor time, I’m still challenged with the physicality of operating this machine. It’s remains laborious.

This year, I splurged and hired a plow service. While he plows the driveway with his truck, often before the first light of day, I watch from my kitchen window, between the slats, coffee in hand, slippers on my feet, and dressed for indoors in flannel pajamas. I find it to be less laborious.

Oh, yes, I still use a shovel to even the edges. Easy!

Steve (srbottch.com). February 2021. *thank you, Liz!

For more fascinating shovel info, check out ‘wonkee donkee tools, an English website and it’s not laborious https://www.wonkeedonkeetools.co.uk/shovels/what-are-the-parts-of-a-shovel